You can set up a grid question, which has a rating scale along the top, and the items to be rated down the side and then ask respondents to rank the items in order. If you want to make sure that they give a unique rank to each value, you can apply the necessary constraints by using the rating check tool from Snap ToolKit.
You can also use the Rating Check tool to specify the number of questions that respondents can rate. For example, if you wished them to rate the top three features from a list of ten, you can ensure that the respondent can only rate three features.
Background
The Snap ToolKit tools allow you to add functionality to an already published survey. Note that if you make changes to the original survey and republish, you will need to re-apply the added functionality.
This worksheet tells you how to create a grid question of five options to be ranked in order. It then explains how to apply the rating check to the survey, to ensure that respondents answer the question in a specified way.
Summary of steps
- Step 1: Adding the rated grid question to your survey
- Step 2: Adding the rating check requirements
- Step 3: Process the ratings check
Step 1: Adding the rated grid question to your survey
- Open the survey which will have the ratings question in it.
- Select Grid First in the Style list and then press [Enter] to add a Grid first question to your survey.
- Enter the question text “Please rate the following modes of transport in order of frequency of use”. Press [Tab] and type “1” as the first code label.
- Press [Tab] again to create a new code label and repeat from 2 to 5.
- Press the down arrow to enter the text in the grid label. Enter “Foot”.
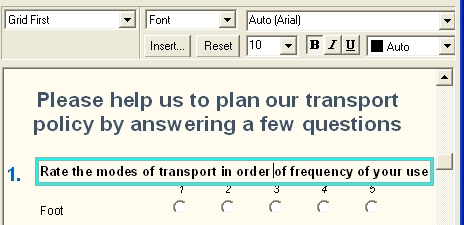
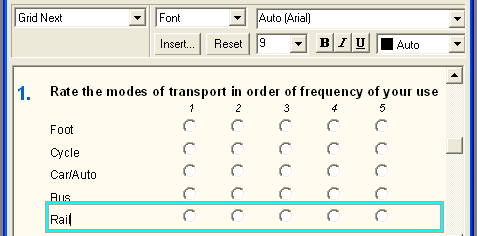
- Press [Ctrl]+[Enter] to create a “Grid Next” type question. Enter “Cycle” as the grid label. Repeat for “Car/Auto”, “Bus” and “Rail”.
- Save your survey by clicking
 .
. - Publish your survey by selecting File| Publish or pressing [Ctrl]+[Alt]+[W]. Take a note of the path of the published file.
Step 2: Adding the rating check requirements
- Start the Rating Check tool by Selecting [Start] on the Microsoft toolbar, then type Rating Check in the ‘Search programs and files’ box.
- Browse for the published file that you previously noted. The file will have an .htm suffix for a Web HTML survey, a .zip suffix for a Snap WebHost or an Offline electronic survey.
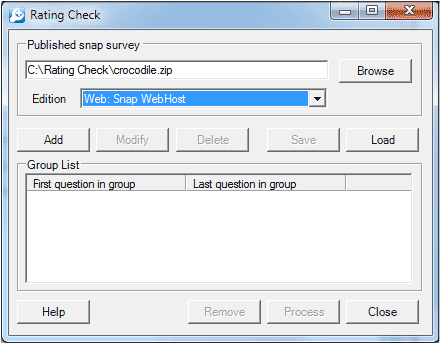
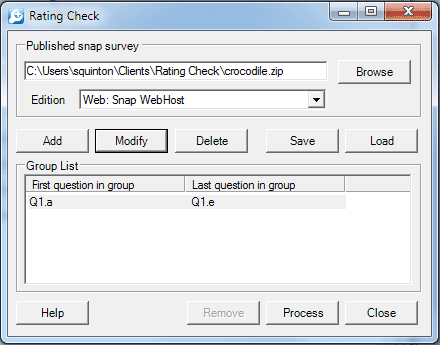
- Select the relevant edition from the [Edition] dropdown. Click [Add], the Add group dialog appears. The ratings question in the worksheet example is Q1. Select the first element of the grid (in this case Q1.a) from the drop-down list. Since this is a multi-part question, the “Last question in group” box is then enabled with its best guess at the appropriate value, and the Group variable type is set.
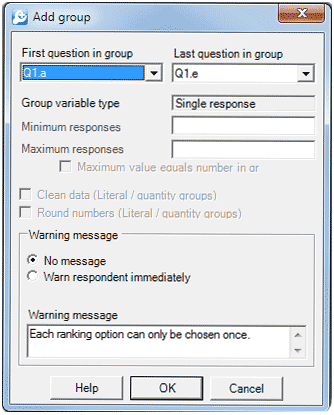
- Check that the last question is set as you wish. By default No message is chosen, as the ratings check ensures that the respondent cannot give two items the same rating. (If you require them to rate all the items, set Must answer in the variable properties for those questions when you create the survey).
- Click [OK]. The Ratings check dialog now shows details of the added question. Select the question and click [Modify] if you wish to make changes. Repeat points 3 to 4 if you wish to apply to multiple editions.
Step 3: Process the ratings check
- Click [Process] to apply the ratings check to the survey.
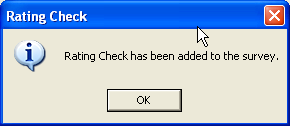
- A confirmation dialog appears
- Click [Close] when you have finished creating rating checks.
- To test the survey, you need to upload to your WebHost account and preview the survey. Do not re-publish the questionnaire from the desktop software because this will overwrite the published file that you have just applied the settings to.
Your questionnaire is ready for respondents to complete.
If there is a topic you would like a worksheet on, email to snapideas@snapsurveys.com