Show as Buttons

This feature lets you show closed question choices as clickable buttons. This includes using images instead of labels. You also have the option to show or remove the check box. This is available for Single Choice, Multi Choice and Grid questions.
You can follow step-by-step instructions to create clickable images with our tutorial.
Showing the labels as buttons
The As Buttons option is available in the Show toolbar topic.
- Select the Single Choice, Multi Choice or Grid question.
- Select Show from the toolbar topic menu.
- Select As Buttons from the next drop-down.

- Select the Show checkbox. This enables the Options button.
- Click on the Options button. This opens the Code labels as buttons dialog where you can customise the appearance of the question.
Choose the colours
You can change the text and background colours displayed for both the unselected and selected labels.
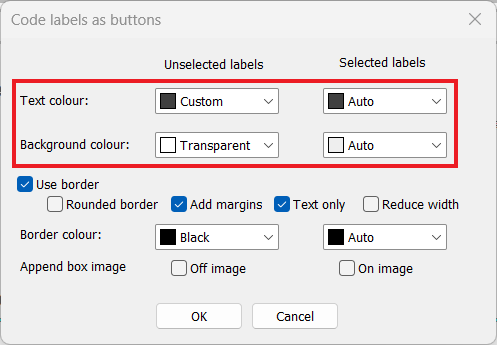
- Click the colour drop down to select the text or background colour.
- Select the colour or click More Colours to create custom colours.
- Click OK to save the changes.
Check that the colours are correct by previewing the questionnaire.
Choose the border
You can choose whether to show a border around the active code label, and set the properties of the border style.
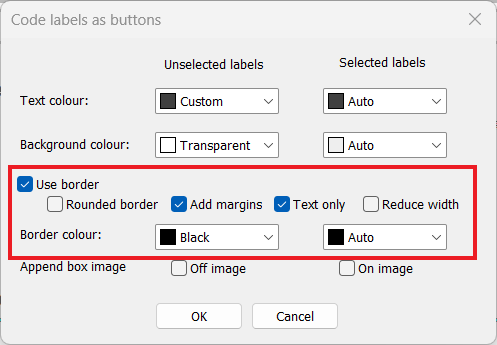
- Select the Use border check box. This enables the border options.
- There are 4 border style options
- Rounded border gives a round shape at the each end of the border.
- Add margins adds space around the code label text.
- Text only changes the border width to the width of each code label text.
- Reduce width decreases the code label size to the largest text width of the code labels.
- Choose the border colour that is shown when labels are selected or unselected.
- Click OK to save the changes.
Check that the border appearance is correct by previewing the questionnaire.
Default border
When you select Use border, this will show the default border options.

This displays the code labels with a square border, no margins at the top and bottom. If the question has multiple columns, the labels are equally spaced across the page.

Rounded border
Selecting the Rounded border option, shows the buttons with rounded ends.

Add margins
Selecting the Add Margins option, adds a margin at the top and bottom of the text and/or image.

Text only
Selecting the Text Only option, shows the border around the code label text without spacing.

Reduce width
Selecting the Reduce width option, moves the labels closer together and does not use the full page. The label border reduces to the width of the code label border to the width of the longest text.

If both Reduce width and Text only options are selected then the label border widths are defined by the Text only option.
Append box image
You can display a checkbox using either the Off image or the On image, which shows when the code label is selected.
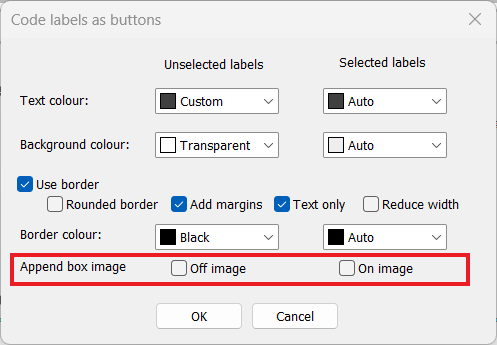
For example, when the On image is selected, this is shown after the code label text on the selected codes.

Displaying with no columns
You can also display the code labels adjacent to each other, without any columns. This uses the Columns settings.
- Select Columns in the topic drop-down.
- Select the None button.

During the interview each code label displays adjacent to the next across the full width of the page.
Examples
Image only

Label only

Image and Label
