Changing the margin and column layout of your report
To change the number of columns in your report
- Click
 on the toolbar to add a new instruction and select Page Layout. The Page Layout instruction dialog opens. Select the Page Setup tab.
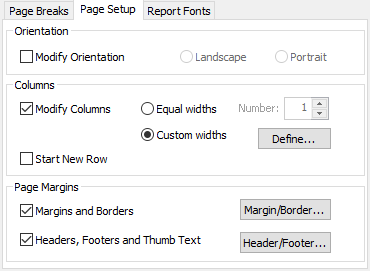
- Select any item that you wish to change on the left, and make the changes to that item on the right.
- Click OK to save your instruction.
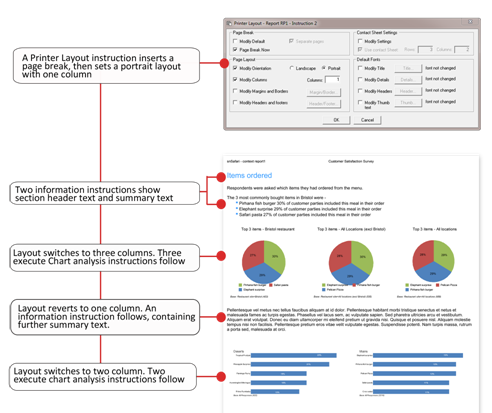
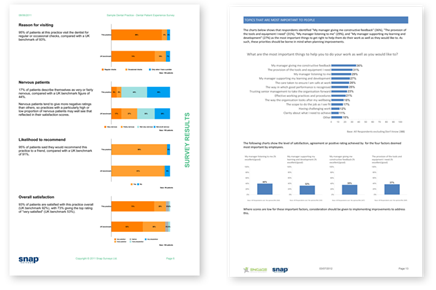
Other example layouts –
Hints and tips
Add a page break at the beginning of each page. This ensures page layout for one section does not overlap into another.
Use the text grid instruction to insert text tables.