Creating a banner footer (or header) with indented report text
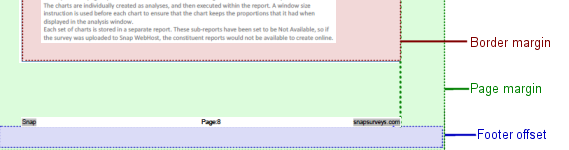
The distance between the edge of the page and the edge of the headers/footers is set in the report page margins (shown in light green in the image below).
The distance from the edge of the headers/footers to the report content is set in the report border margins (shown in light red in the image below).
Border margins are only used if you have enabled a report border.
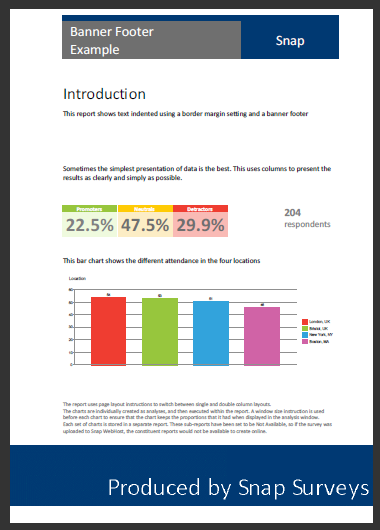
If you want a full width header or footer (for example, including a banner graphic) but you do not want the report content to be full width, you will need to set the page margins to position the header/footer, and the border margin to position the report content (using a transparent border).
The picture below shows the page margin set to 0 at the right and left so you can use the full width of the page

-
Click
 on the toolbar to add a new instruction and select Page Layout. The Page Layout instruction dialog opens. Select the Page Setup tab.

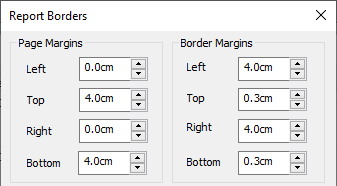
- Select Margins and Borders and click the Margin/Border button to open the Report Borders dialog
- Set the Left and Right page margins to 0
- Set the Top and Bottom page margins to the height of your header and footer graphics.
- Set the Right and Left border margins to the width you would like between the page edges and the report text
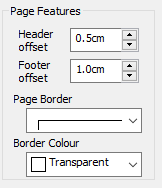
- Set the Page Border to a style and set the Border Colour to Transparent.
- Click OK to close the dialog.
- Select Headers, footers and thumb text and click the Headers/Footers button to open the Headers/Footers dialog.
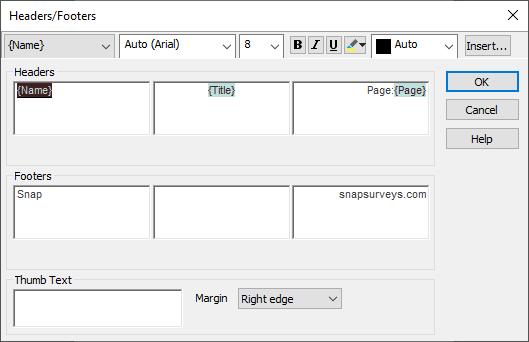
- Remove any unwanted default text, and then click in the central footer pane.
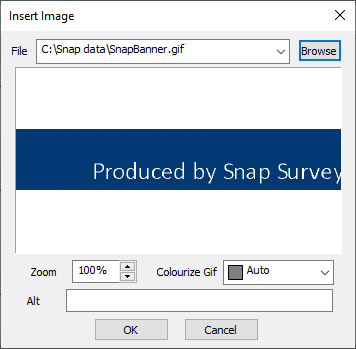
- Click the Insert button and browse for your footer graphic. Check that the Zoom is set correctly, and then click OK.
- Click OK to save your new footer, then click OK to save your page layout instruction.
- Run your report with the new page layout instruction.