Producing a comparison report using a context value
A comparison report compares a single individual, department etc, against the performance of others in your organisation or against a general benchmark. The survey uses variables that define the individuals or departments that you wish to evaluate.
Context values allow you to select data that is relevant to that individual or department.
Steps for generating context reports
- Create variables for the items that will produce the individual reports. These are your context variables.
- Create any derived variables needed to analyse your context data relative to other data or a benchmark.
- Create your reports, referencing the context for each item that you want to personalise.
- Add context filters to your reports to select the appropriate data.
- Test your reports by setting the context manually.
- Set up your reports to run automatically through all the context values.
Setting up a derived variable to analyse your data
If you wish to include some comparison charts, showing how the subject of the report compares to the average, then you cannot use a filter, as this would only use the subject data. Instead, you must create a derived variable that you can use to break down your data.
This example shows you how to set up a derived variable for the Crocodile Rock Cafe survey supplied with Snap XMP Desktop, allowing you to compare ratings for the current (contextualised) location with ratings for all locations. It allows comparisons between the current location and all locations (including the current) and other locations (all locations excluding the current location).
- Open the Crocodile Rock Cafe survey supplied with Snap XMP Desktop.
- Click
 on the Snap toolbar to display the Variables window.
 - Click
 on the Variables window toolbar to add a new variable.
 - Specify the Variable details:
- Name: CComparison
- Label: Compare context to all
- Type: Derived (the variable will derive its data from Q0, the existing location question).
- Response: Multiple (each respondent will fall into two cases).
- Double click in the first code label and click the Insert button. Select Variable Field from the drop-down list.
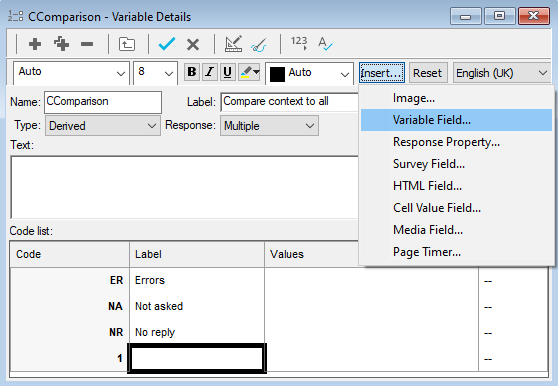
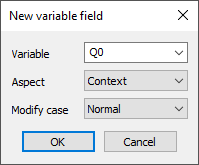
- Select Q0 (the location) as the Variable, and Context as the Aspect. This will give the selected location as the code label. Press OK to return to the variable definition.
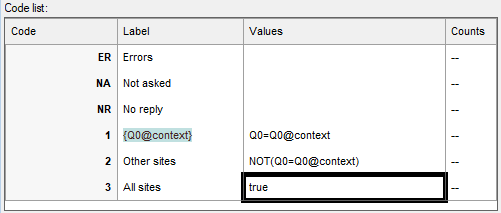
- In the Values field, enter Q0=Q0@context. This code will be used when the response applies to the specified location.
- In the next Label field, enter Other sites. Then enter NOT(Q0=Q0@context) as the Value. This code will be used when the response does not apply to the specified location.
- In the next Label field and enter All sites. Then enter True as the Value.
-
Click
 to save the comparison variable.
Creating a comparison bar chart
You can use a context variable to create a comparison bar chart that compares the results of the subject of the report to a benchmark value or the data for other subjects.
To set up the comparison chart you need to:
- create derived variables for the comparisons you wish to make
- define the chart
- set the context to test the chart
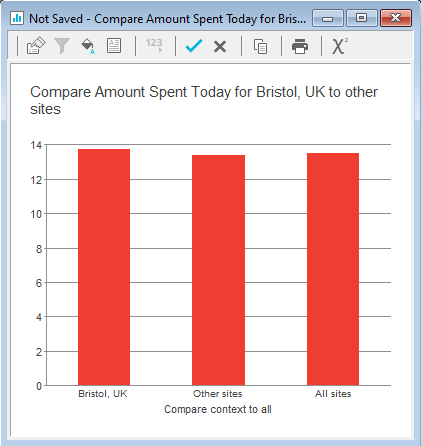
This example uses the Crocodile Rock Cafe survey to compare the average amount spent at one site with amounts spent at other sites.
-
Click
 to display the Analysis Definition dialog for a chart.
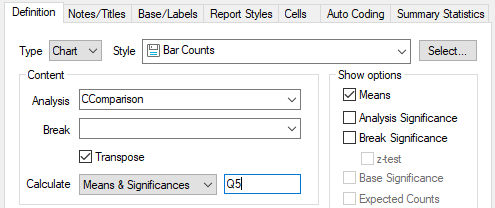
- Select the chart style Bar Counts from the drop-down list.
- Type the names of the derived variable into the Analysis field, for example CComparison.
- Check the Transpose box.
- Select Means & Significances from the Calculate list and enter Q5 as the variable to use.
- Change to the Notes/Titles tab and click in the Title field
- Enter the title of your chart, using the Insert button to open the Variable field... dialog and insert the Label Aspect of Q5 and the Context Aspect of Q0 in the title.
- Clear the Chart Axis titles.

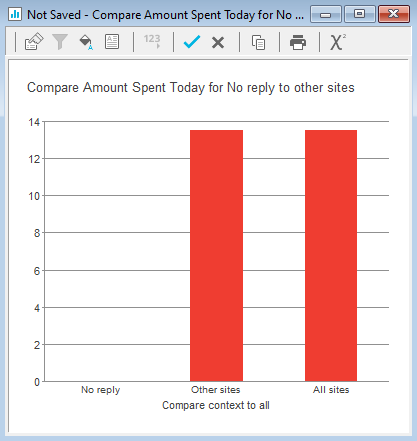
- Click Apply to see your chart. It will have no data for the subject as no context has been set.
- Select File|Context Values to open the Context Values dialog.
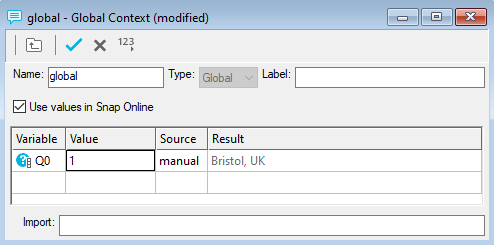
- Double click the global context value to open it. This allows you to set the context to a specific value.
- Set the Variable to Q0 (the location) and the Value to 1. This sets the current context to Bristol.
-
Click
 to save the context.
-
Click
 on the chart toolbar to update the chart. The context information will appear.
