Sending SMS invitations
Sending survey invitations to your participants lets them know about your survey. In addition to sending email invitations, Snap XMP offers the ability to send SMS survey invitations to your participant’s mobile phones containing a link to access the survey directly from the SMS message. Providing a link to the survey gives the participant access to the survey directly from the SMS message, helping to improve the response rate. A smart phone is required to complete the survey via the link.
This tutorial describes how to set up the participants data then upload the participants using Snap XMP Online and create email invitations and reminders using Snap XMP Online that enable the participants to access the survey directly from the SMS message.
There is also a video demonstrating how to send SMS invitations that can be found at SMS Invitations from Snap Surveys on Vimeo.
Email to SMS service pre-requisite
To provide SMS survey invitations you will need a custom email address, provided by Snap Surveys, that is associated with your Snap XMP Online account. Please contact our sales team about enabling this feature on your account. This email address will be used for sending all future invitations from your Snap XMP Online account and is used by your chosen SMS provider to authenticate your messages as they are sent.
Prior to sending SMS survey invitations you need an account with an SMS messaging service provider. This is a service provided by a third party that sends bulk SMS messages from your organisation, for purposes such as invitations, reminders and alerts. Your organisation may already have an existing account with an SMS messaging service provider. If this is not the case, you need to sign up for an account with an SMS message service provider. Snap Surveys does not provide recommendations for any service providers. However, the provider that you decide to use must provide an Email to SMS service to be able to send SMS survey invitations.
Step 1: Create an Email to SMS service account
Make sure that you have an account set up with a SMS messaging service provider and a custom email address provided by Snap Surveys. Once an account is set up, register the Snap XMP Online custom email address as a valid sending address within the SMS messaging service account. Please refer to your SMS messaging service provider’s documentation for further details on how to set up the Email to SMS service.
Step 2: Create and publish the survey
In Snap XMP Desktop, create the survey making sure that you include mobile editions as the participants are likely to access the survey directly from the SMS message on their smart phones.
Publish the survey in Snap XMP Desktop at Publishing the online editions or Snap XMP Online at Publishing your survey.
Step 3: Set up the participant data file
The data file containing the participant details must contain the unique participant email address required by the SMS messaging service. This email address is usually configured in the format
International mobile phone number of the participant @ SMS service provider domain name
For example 447712345678@smsprovider.com where 447712345678 is a participant’s UK mobile phone number in international format and smsprovider.com is the domain of the SMS service provider.
Check that this is the required format in the documentation provided by your SMS messaging service provider.
An example Excel spreadsheet is shown below, containing login information (ID); SMS email (Email) and first name (Name).
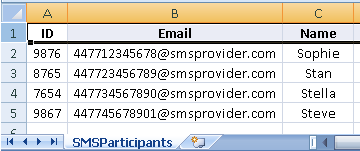
The data file may also contain other login and seeding information.
Step 4: Upload the participants in Snap XMP Online
In Snap XMP Online, you can upload participants to the survey prior to sending out invitations.
- Open your survey in Snap XMP Online and in the survey’s Summary click the Collect link.
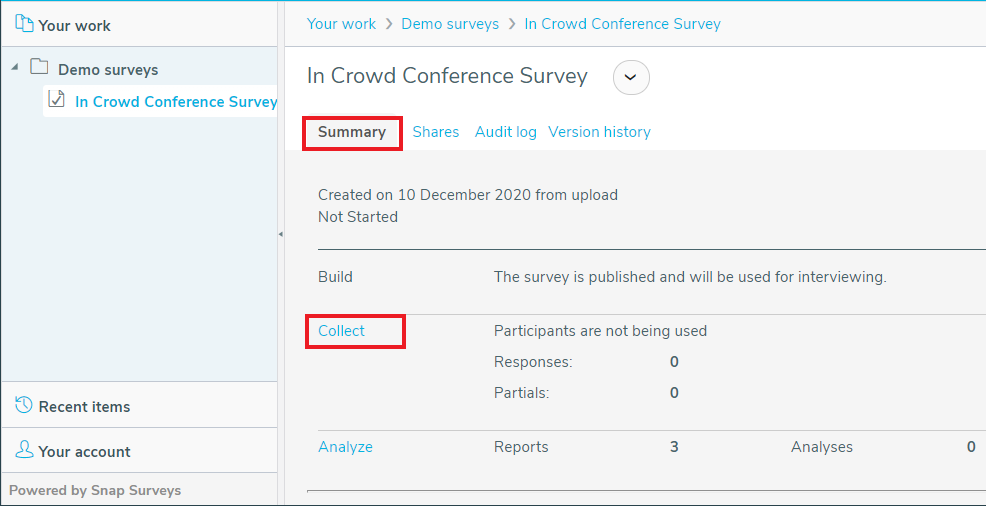
- Select the Participants side menu to view the participants and invitations. The Participants Overview is selected by default
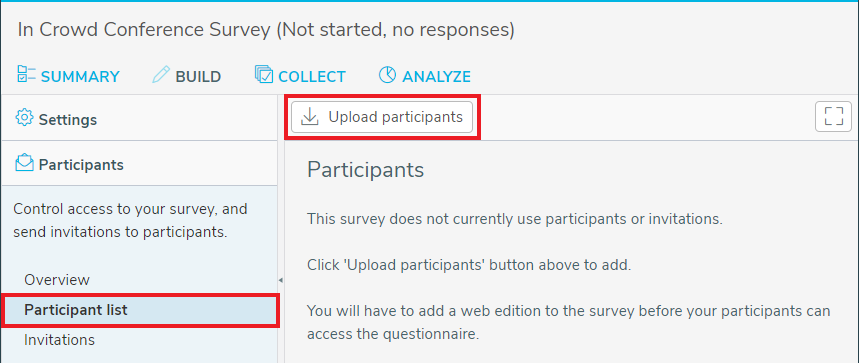
- Click on the Participant list menu item to view the participants.
- Click on Upload Participants to open the Upload Participants Wizard, which guides you through the steps to add the participants to your survey.
- On the first page, click Select file to add the file with the participants’ data. The accepted formats are CSV and XLSX.
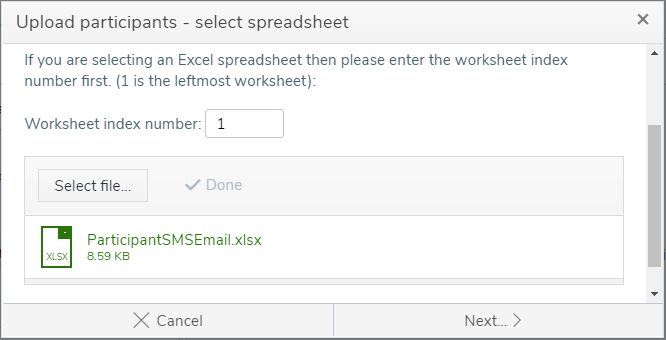
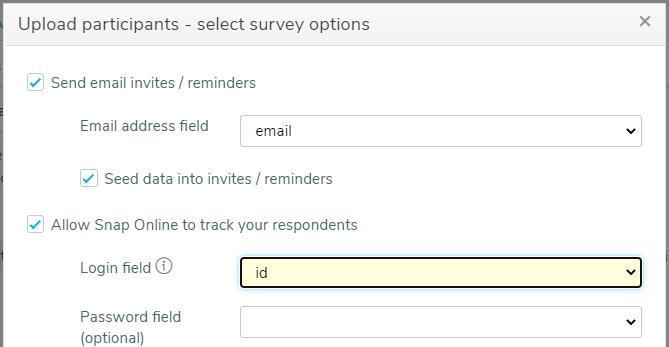
- Click Next. The next page shows the survey options for sending email invitations and logging into the questionnaire. In this tutorial, email invitations are sent (converted to SMS format by the SMS messaging service provider) and the participants are going to log into the survey automatically. The email invitations are going to contain the participant’s name. For this the following survey options are selected:
- Select Send email invites/reminders to be able to send emails.
- In the Email address field, select the spreadsheet column that contains the email address for the participants. This field is required and this defaults to match the most likely column. In this tutorial, it is set to email to match the spreadsheet column.
- Select the Seed data into invites/reminders checkbox so that the invitations can contain the participant’s name.
- Select Allow Snap Online to track your respondents, which requires the participants to log in.
- In the Login field, select id to match the spreadsheet column
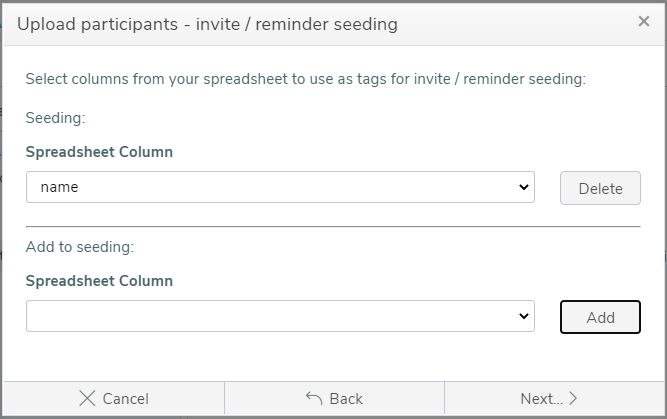
- Click Next and complete the invitation seeding. Select the field name and click Add to make the name information available when you create the invitations and reminders.
- Click Next to show the overview page then click Upload to upload the participants to the survey. The results are displayed when the upload is complete. Click Finish.
Questionnaire seeding is also available when adding participants, but is not shown in this tutorial. Further details on how to set these options can be found at Uploading participants from a spreadsheet.
Step 5: Create plain text invitations in Snap XMP Online
The invitations must be created as plain text emails because the SMS messages cannot contain HTML.
- Click on the Invitations menu item to view the invitations.
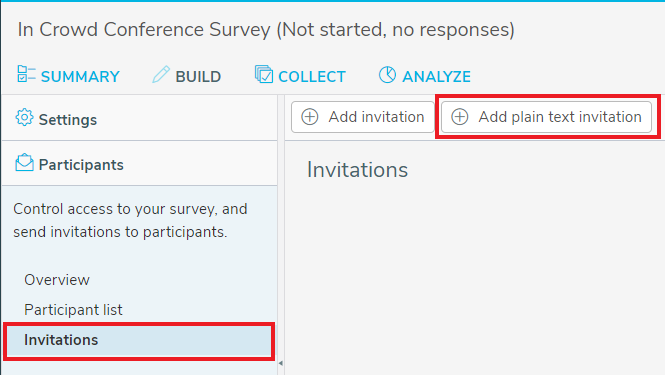
- Click the Add plain text invitation button to display the invitation email editor where you can compose the email you wish to send to your participants.
- In the Title field, enter the name that describes the invitation or reminder.
- In the Subject field, enter the email subject that the participants will see. There are two tags available in Insert tag into subject. These are Survey Title and Username.
- Enter the SMS message text, by overtyping [Add your text here], in the email message field. Click Insert tag into body and select name to add the name field in your email message greeting.
- You must include the survey link in the message for participants to access the survey from the SMS message. In Insert tag into body, click SurveyLinkAuto to add a link that automatically logs the participant in and shows the survey. If you want the participant to enter the log in details then use SurveyLink.
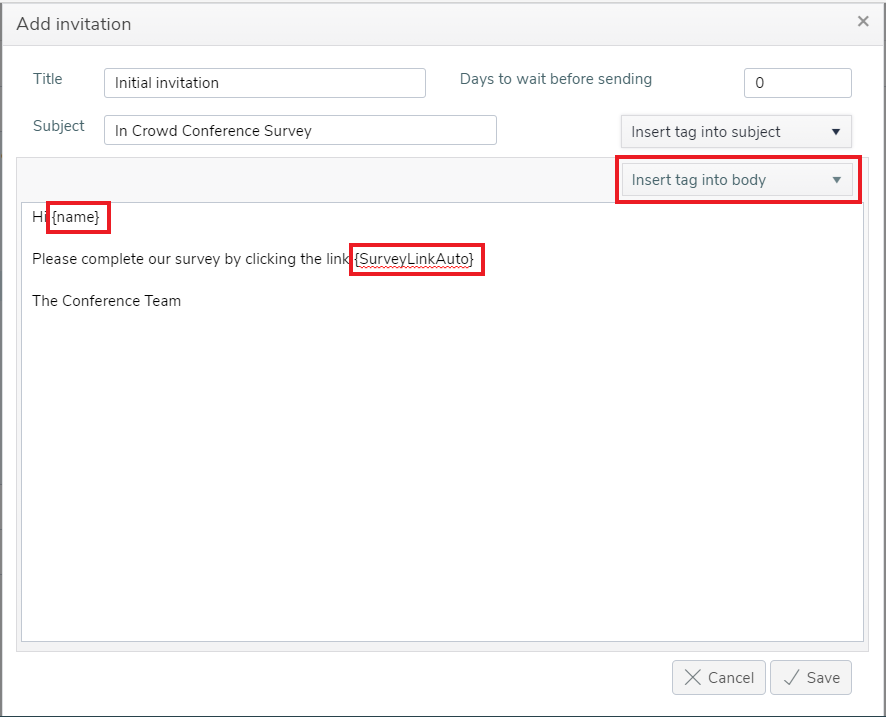
- When you have completed the SMS invitation click Save to save your changes.
When creating the SMS invitation, consider the length of the message. A standard text message length is 160 characters. The link in the message is replaced with the full web address of the survey which you need to include in the message length. Multiple messages will increase the cost of sending the invitations to participants.
Step 6: Test the invitation
Before you send the email invitations to your participants you can check the format of the invitations by using the test functionality.
- In the Invitations section, click the Test button.
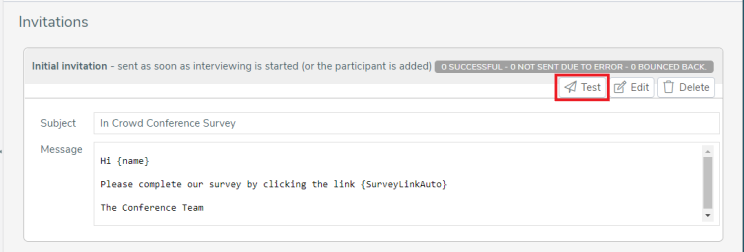
- This displays the Test invitation dialog. Enter an email address that is available for testing.
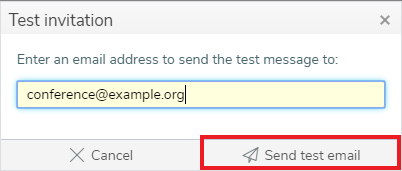
- Click Send test email. A test email invitation is sent to the test email address.
- When the email arrives check that the format is as you expected. The email will substitute one of the participants in your list to test the invitation seeding is correct. Check that the survey link opens the survey.
- Once the invitations are ready to send you can start interviewing. Further details on starting interviewing can be found at Collecting your survey data.
To test that the SMS message is delivered, you will need to upload a database containing your own email address i.e. 447712345678@smsprovider.com (where 07712345678 is your UK mobile phone number).
To manage the load on our email relays, as well as the subsequent load as respondents complete their survey, we limit the speed at which emails are sent, this is primarily to make sure that each respondent has a good experience and fast response times, to encourage them to finish the survey. As per the technical specifications on our website (https://www.snapsurveys.com/survey-software/technical-specifications/) , please consider how long it will take for your emails to be sent.
Finally, please consider the number of characters in your survey URL as multiple SMS messages will incur greater costs from your SMS provider.