Using word clouds to display your results
Word clouds allow you to display words from your survey’s responses in a graphical representation. Snap XMP Desktop has a range of features that you can use to customise the appearance of the word cloud.
These features include:
- selecting how many items are displayed
- specify the size variation between different words
- choose the colours used
- decide whether to categorise literals as separate words or as complete responses
- create clouds from open responses or from the labels of coded responses
- automatically categorise open responses using a stop list to stop common words such as “and” or “the” being included in the word cloud
This worksheet shows how to create a word cloud automatically from participants’ comments. It also describes how to change the number of items displayed in your word cloud and tells you how to remove words from a word cloud.
This worksheet uses the Crocodile Rock Cafe survey supplied with Snap XMP Desktop.
Step 1: Creating a word cloud from a literal question
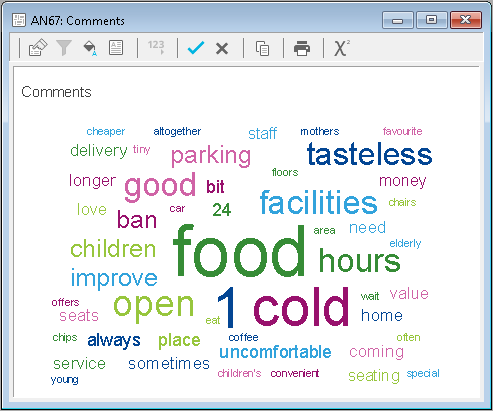
This step describes how to display comments as a word cloud by using auto coding.
- In Survey Overview, open the Crocodile Rock Cafe survey.
- Click Analysis Cloud
 on the Snap XMP Desktop toolbar. This opens the Analysis Definition window to create a cloud.
 - In Analysis, enter Q9. This question asks the participant to give any comments about their visit.
- Click Apply to display the word cloud.
Step 2: Changing the number of entries in your word cloud
If you wish to have more items in your word cloud, change the code limit.
- In the Analysis Definition, select the Auto Coding tab. This tab shows how your data will be coded. These settings may be different, depending on the tailoring defaults set up. Unless you have patterns applied to literals, you would normally use Words for literals and Values for everything else. If you use Values for literals, the complete response is used rather than individual words.
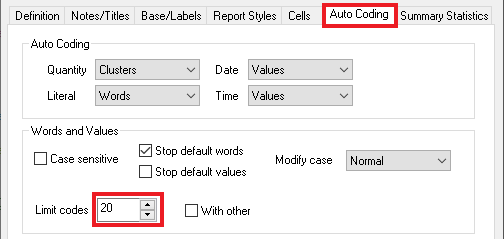
- Change the value in Limit codes to 20.
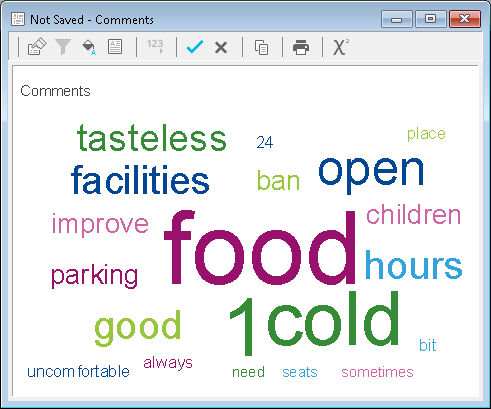
- Click Apply to see the change in your word cloud.
Step 3: Tailoring your word cloud to hide unwanted words
There may be some words collected in the responses that are not helpful or needed in your cloud. You can adjust which words are displayed for an individual cloud by creating a new variable that you can edit then analyse.
- Click Analysis Variables
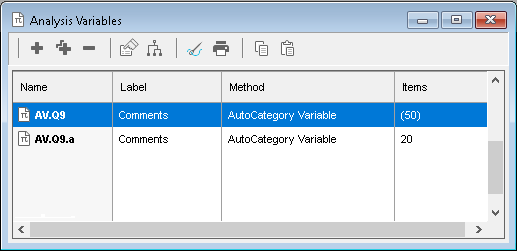
 on the Snap XMP Desktop toolbar. This opens the Analysis Variables window showing the list of analysis variables. The dialog below shows two automatically created analysis variables, AV.Q9 and AV.Q9.a. In the name, AV shows that this is an auto category variable and the next part contains the variable name it comes from. The last part makes the variable unique. The dialog shows the variables created for the two word clouds for Q9.
-
Select the variable AV.Q9.a and click Clone
 on the toolbar to make a copy of it. This is the variable used for the twenty code word cloud. (You can find out which variable was created automatically for an analysis by using the Sources and Dependents button
 on the Analysis Variables window toolbar.)
-
The new variable should open automatically. Click Choose codes
 . This displays a new Include column.
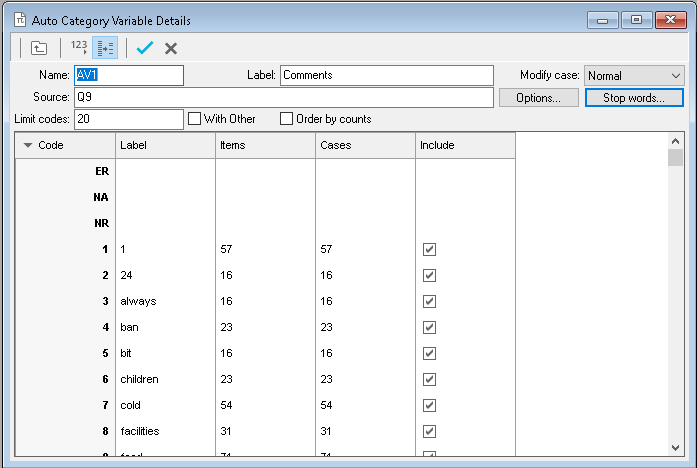
- The first twenty items in the list will be used in a word cloud. Clear the Include box to remove “bit” from the word cloud.
- If you remove “bit” from the list of visible items, the item at number 21 will replace it. If you do not want this item to be used clear the Include box next to it.
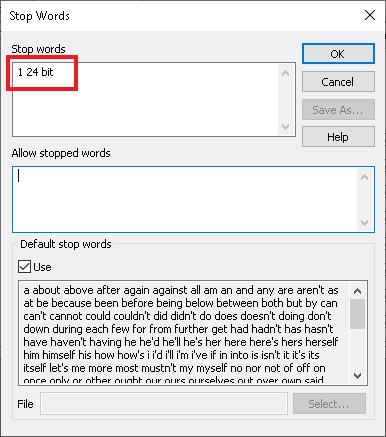
- Clear Include for “1” and “24”. Any excluded words are added to the Stop words.
- Click Stop words to show the excluded words. Removing a word from the list will add it to the included list again. Click OK.
-
Click Save
 to save your new variable.
Step 4: Displaying your tailored word cloud
You now need to edit your analysis to use your new variable.
- Open the Analysis definition for your word cloud.
- In Analysis, enter the new auto category variable created in Step 3
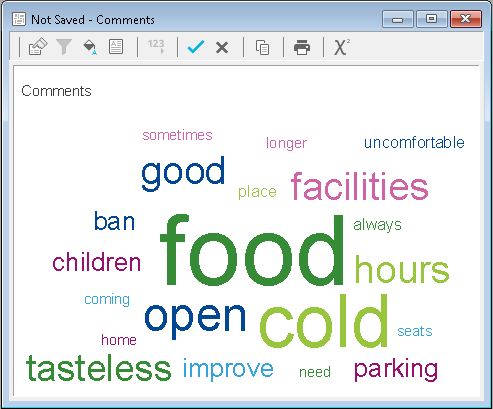
- Click Apply to see the result. The words “1”, “24” and “bit” have been replaced.
Displaying a multiple response variable as a word cloud
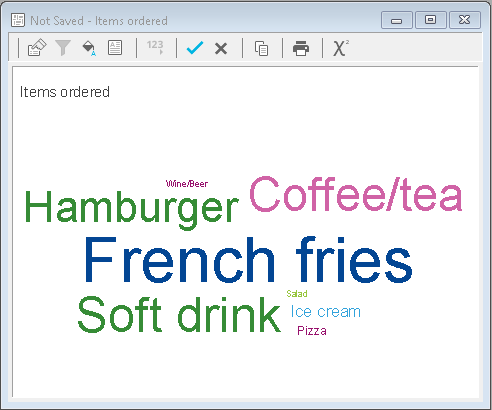
This tutorial has shown you how to display comments as a word cloud. You can also display other types of questions as word clouds. For example, it’s easy to see which type of food is most popular at the cafe.
If you would like to find out more about word clouds, see the topic Overview of word clouds. This covers creating clouds from any type of variable. To find out about changing the word cloud’s appearance, see the topic Word cloud appearance.
If there is a topic you would like a tutorial on, email to snapideas@snapsurveys.com